Living Big by Living Small
in relationship with place
I’m inspired by dynamic, well-designed living spaces, and I find both tiny and small homes are more often examples of this than larger homes are. Perhaps it’s because you can, and have to, do more with less. This used to be more of the norm. The average home size in the U.S. in the 1950s was less than 1,000 square feet. In 2015 it was about 2,600 square feet. And conversely, while our houses are getting bigger, the number of people living within them is declining. In 1950 there was an average of 3.37 people living in a household; by 2003 this had shrunk to 2.56 people. The number of people that can afford to buy a home is also declining, as larger homes cost more to build, buy, heat & cool, clean, and maintain than smaller homes. And what is happening to our outdoor play space? As homes get bigger, yards get smaller. For me the outdoors is where the most-intriguing life and play reside, and I want more of that!
For these reasons and more, I chose the smaller-house path, with an aim of evolving the capacity of any home (whatever its size) beyond the building’s envelope to incorporate the home’s surroundings, and how home and context can consciously relate to, and beneficially shape, one another. This has been very fulfilling, joyous, and full of learning as my experiences and understanding have grown; this piece of writing is intended as a platform to share some of those with you, in the hopes that your efforts will leapfrog mine in their effectiveness, comfort, and potential.
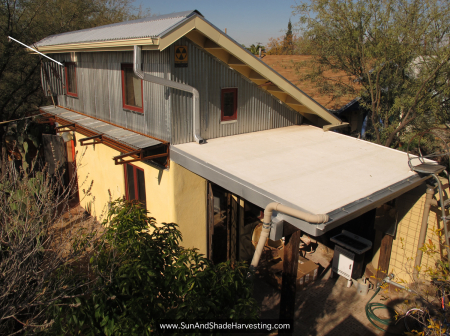
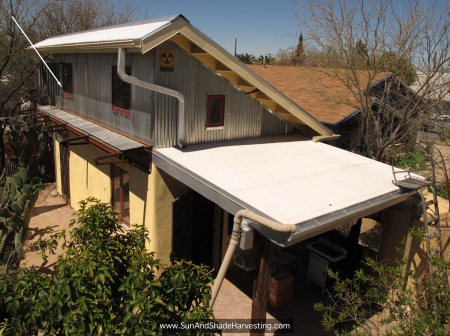
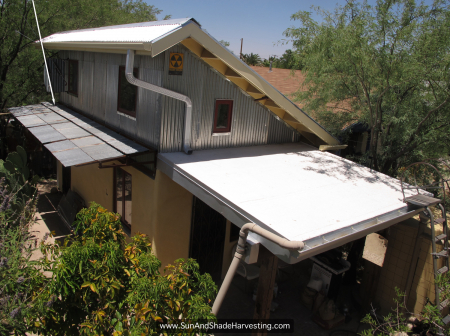
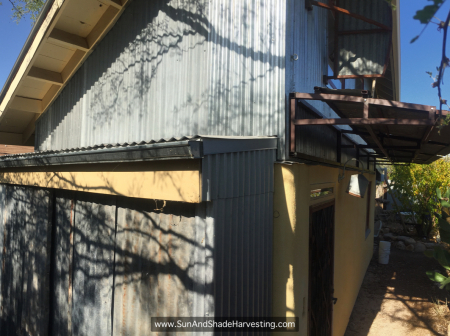
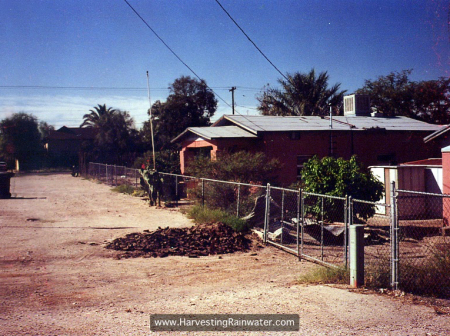
My small-house story starts like this…. In 1994, my brother and I escaped the world of paying rent when we purchased an about-to-be-condemned 1919 adobe bungalow on an eighth of an acre just north of downtown Tucson, Arizona, for $33,000. We slowly renovated the home and yard into a sustainable showcase, bringing in income in the form of tours and workshops we held on site. Thanks to this and our frugal approach, we never went into debt. For many years we (my brother, his family, and I) all lived in that same 740-ft2 house (where I also worked). But as the family grew, I decided to move into the site’s stand-alone 200-ft2 one-car garage (figure 1) after transforming it into a cottage, or “garottage.”
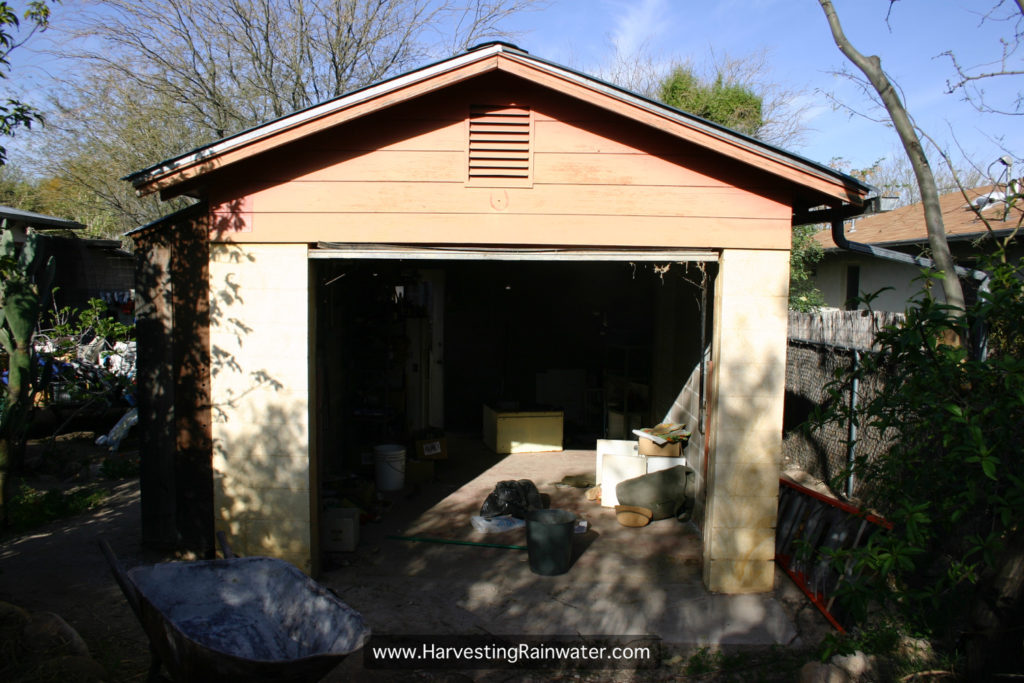
The garage was available for this purpose because my brother and I had decided to keep cars off the property when we bought it, parking instead on the street. This gave us more space. A couple years later, in 1996, I sold my truck and have not owned a car since, as I prefer to bicycle or walk instead. This saves me over $8,000 per year (the American Automobile Association (AAA) estimates the average American pays over $8,000 per year to own, operate, fuel, insure, and maintain the average automobile), and has enhanced my health. When I need a vehicle, I borrow one from my brother or a friend, or I rent one. The only downside of moving the car out of the garage was that, over time, we filled the space with stuff we rarely used. Part of the good news of the garage’s transformation from dead storage space into a living space was that we were prompted to get rid of the stuff. Some was used in the retrofitting of the building; the rest was given away. It was so freeing to have the weight of the stuff gone!
Live big by living small
But at first, sitting in the now-empty garage, I got depressed. The space was a small, dark, uncomfortable box of concrete block. When I realized this was the perfect opportunity to push the potential of what a tiny or small house could be, though, all shifted. I wanted the small garottage space to feel expansive and connected, and I wanted to maximize the bigness of its potential positive impacts in such a way that its example and strategies would be accessible for a great many people. To achieve this would require involving far more than the structure itself.
Key components would include the ways the structure could dynamically integrate with its surroundings—how it could naturally and freely heat and cool itself; how the surrounding landscape could support vegetation to further heat and cool the building and feed those within, while being watered by the runoff from the roof; how that same rainwater coming off the roof could provide all the water needed within the building; how the project would reinvest more water back into the local hydrology than it would take out; how it would generate more power than it would use; how the rooms could be both indoors and out, and on our property and within public property, etc. Attaining this full impact would rely on relationship. How could this space, and my living within it, strive to be in beneficially reciprocal relationship with this place?
Collaborate with the sun
Thus my quest began with a stand. A stand to make my home’s orientation to the sun a core feature of the project. Why? Because, while this is very rarely consciously incorporated into a home project, I see it as foundational for a building (of any size) to be in relationship with its place. Perhaps this approach to design is so rare because modern society has become so dependent upon costly mechanical heating, cooling, ventilation, and lighting systems, and simultaneously forgetful of or blind to the incredible potential of working with free, passive systems in relationship to natural patterns. Thankfully the garage’s orientation to the sun was already ideal for free, passive winter heating and summer cooling. At our latitude, the winter sun rises in the southeast, sets in the southwest, and stays low in the southern part of the sky throughout the day. However, in summer the sun rises in the northeast, arrives due east around 9 am, peaks nearly directly overhead at noon, sits about due west at 3 pm, and sets in the northwest. Thus it was perfect that the building’s long south-facing wall was open to the winter sun, thereby maximizing free winter heat and light all day long. That the east- and west-facing walls receive the summer’s morning and afternoon sun are shorter serves to minimize unwanted direct summer sun and heat exposure.
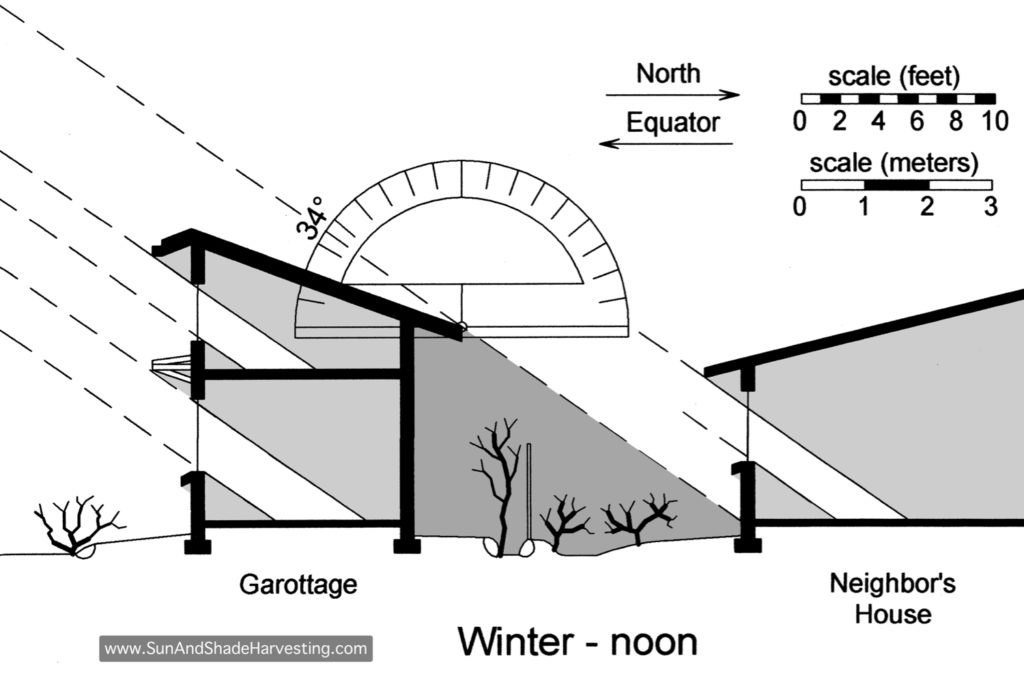
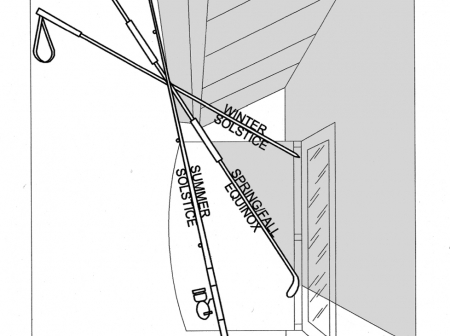
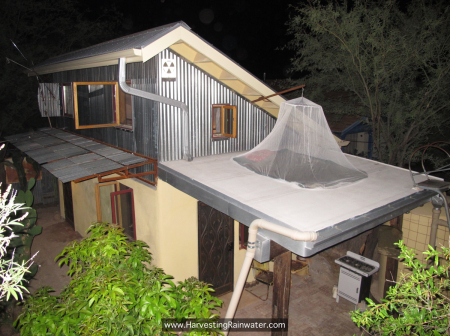
To enhance this sun relationship for all, when I raised the roof to create loft space and more winter-sun-/south-facing windows, I was sure to maintain winter sun access for my neighbor’s house to the north by limiting the height of the roof and setting its angle close to that of the winter sun. This ensured both buildings had the potential to be freely heated, lit, and powered with the sun, rather than with costly fossil fuels (figure 2). The south-/equator-facing roof overhangs and windows were then designed to let in the maximum amount of direct winter heat and light, while shading out the maximum amount of direct summer sun (figures 3A–6).
Passive summer shading/cooling was further augmented (without hindering winter heating) by building a covered 100-ft2 outdoor kitchen on the east side of the structure and by planting food-bearing trees to the east and north. West-side shading was enhanced by building an outdoor closet/shed against the west wall, and planting more food-producing trees (figure 7A).
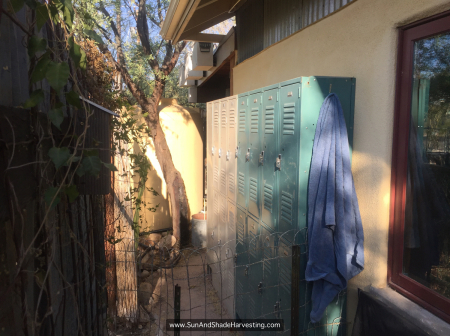
North-side shade from the rising and setting summer sun was achieved by placing salvaged lockers against the north wall (figure 7B), and planting vines to grow up the north-side fence. As a result, I’m bathed in the warm glow of direct sun throughout the winter days, and in summer I’m embraced by cooling shade—passive bliss. (Additional passive heating and cooling strategies can be seen here and here.)
An open room is a roomier room
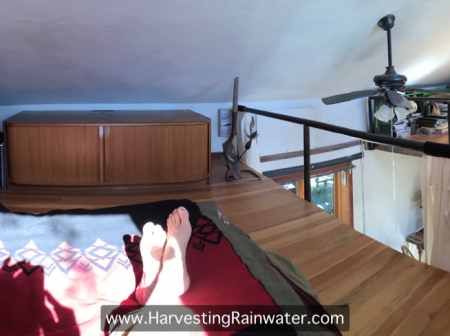
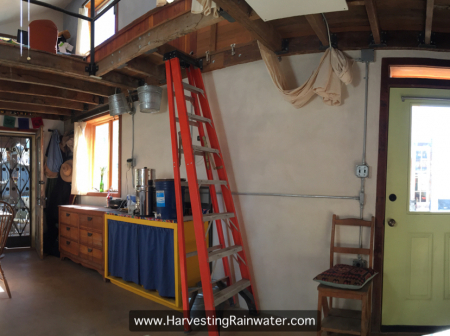
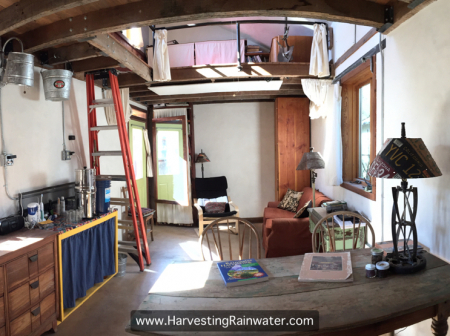
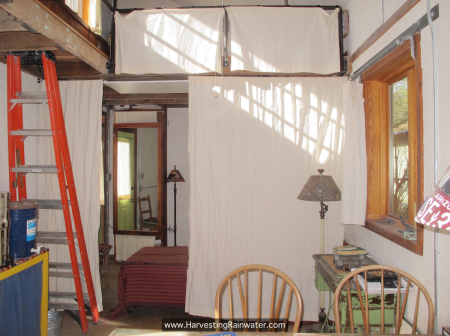
To make the interior feel and act bigger, it was left open as one multi-use room (figures 8–10). Open space between lofts provides an expansive feeling and allows for more air movement and entry of light. I can temporarily divide the larger room with curtains into smaller curtained rooms as needed (figure 11).
Rooms indoors and out
Living space extends beyond the building into the glorious outdoors. By minimizing the footprint of the buildings, we maximize the yard space in which we can grow and interact with abundant life. Placement of typically indoor rooms outside enables us to more easily interact with that life, while avoiding the cost of building such rooms indoors (figure 12).
Get your water from the sky, and strive to beneficially cycle it as many times as you can
Another core design driver was for the building to be net-positive in regards to water, meaning it would give back more water than it would take from our community’s hydrology. We don’t extract water from elsewhere to meet our needs, rather we capture and invest free on-site water. Thus, all irrigation needs of the landscape and garden are met with on-site rainwater and greywater distributed by gravity-fed systems (pipes maintaining a minimum 2% slope) and then harvested within mulched basins. All water for the garottage comes from its own roof plus a 100-ft2 section of the main-house roof, and is directed to two 1,000-gallon rainwater tanks which double as a fence and privacy screen on the northern property line (figure 12).
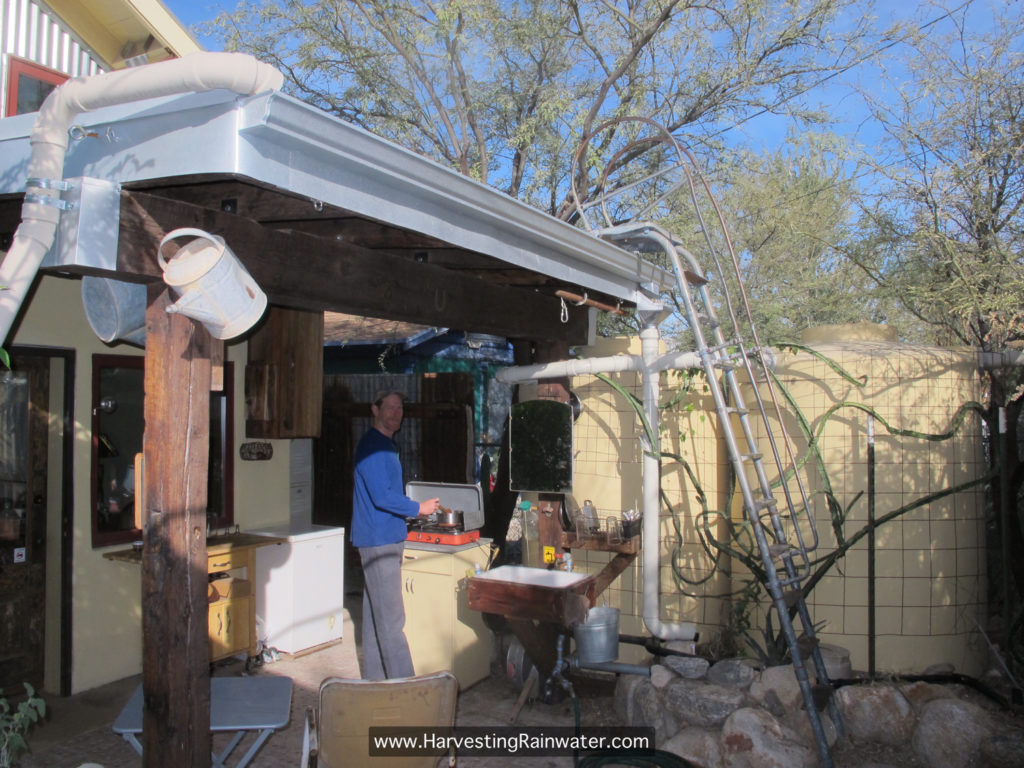
Overflow from the tanks cascades through stepped rain gardens from the top of the yard to the bottom. The roof catchment for the tanks is made mostly from 26-gauge corrugated Galvalume steel, with biocide-free elastomeric paint on the kitchen roof.
Reinvest all on-site organic matter to enhance fertility
A legal, site-built compost toilet, permitted via an experimental pilot project which is part of an ongoing effort to legalize site-built compost toilets statewide, takes care of that need, while turning human waste into a safe and fertile soil amendment (figure 13). Finished compost has been tested by a University of Arizona lab and been found to be completely safe, very fertile, and to far exceed the quality requirements of products of commercial composting operations. We use the compost to fertilize the soil around our fruit trees and other perennial plants. (See here for how to build the toilet. See here for how to use and maintain the toilet. See here for the site-built compost-toilet reference designs approved by the Arizona Department of Environmental Quality.)
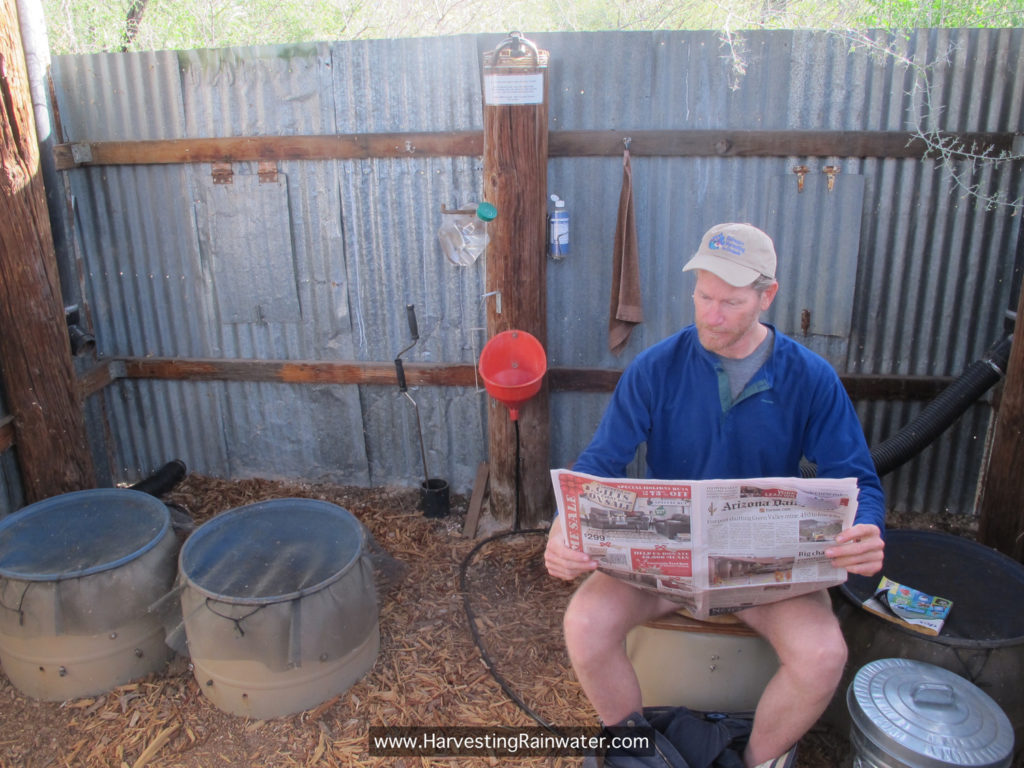
All on-site prunings are cut up and used as free mulch beneath the same plants that were pruned. All kitchen scraps go to our earthworms in the worm bin, or to our chickens.
Share your surplus
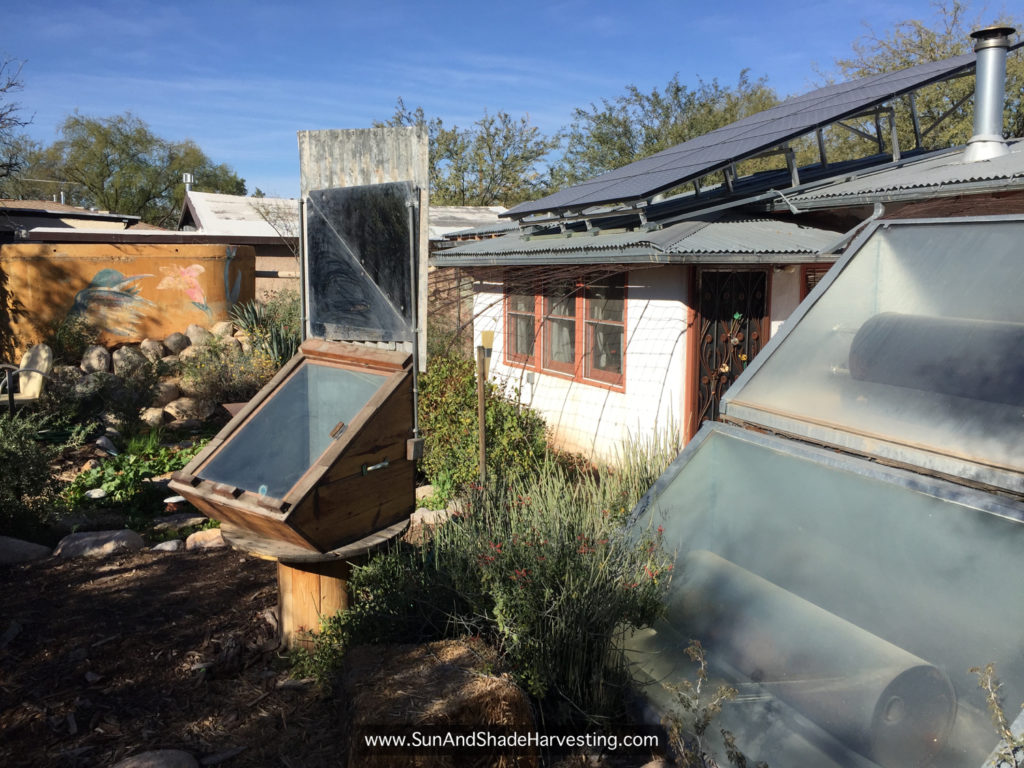
Electricity is generated by a grid-tied photovoltaic solar power system on the roof of the main house. This system produces three times the power needed by both households, with surplus power going to our neighbors via the grid. We are able to generate so much surplus energy due in part to our many energy conservation strategies. While a 5-gallon propane tank fuels a two-burner camp stove in the outdoor kitchen, for oven cooking I use a solar oven I built 20 years ago from scrap wood, metal, insulation, and glass (figure 14). Outdoor cooking keeps unwanted heat out of the house in summer, while improving interior air quality year round. Water is heated on the stove or in a batch-style solar water heater my brother and I built 20 years ago, again using many salvaged materials (figure 14).
Turn “wastes” into resources
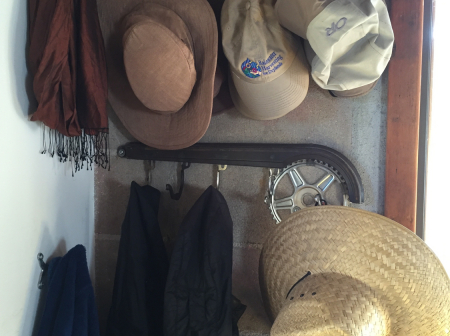
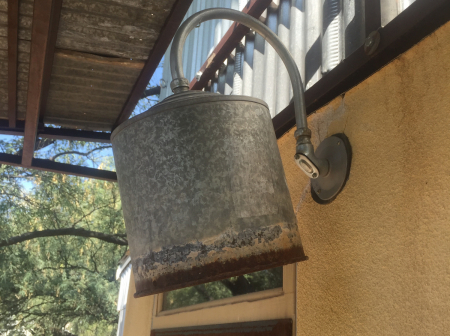
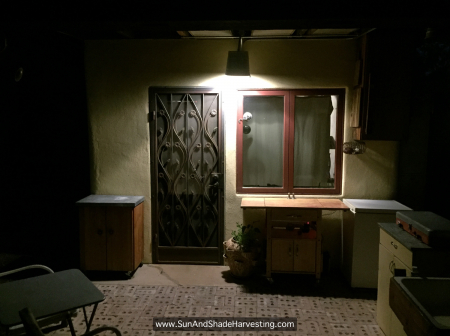
Seventy-five percent of the building materials were salvaged from the waste stream. The metal siding had been the old metal roof from the garage. The wood beams for the loft and porch, along with the outdoor kitchen’s brick floor, came from the Dunbar School being renovated three blocks away. The 2×8 wood studs and 1x planks for the loft walls and roof, along with drywall, came from construction-site dumpsters and salvage yards. Flashing was fabricated from 2×6 metal studs gleaned from a dumpster. The fir flooring and wainscoting came from neighborhood waste/resource piles. Curtains came from scrap fabric from Sonoran Theatre Works four blocks away. Coat racks, hooks, and other hardware were fabricated from salvaged bicycle parts from BICAS, the bicycle cooperative three blocks away (figure 15). I made all the bookcases and some of the furniture out of scrap; the rest was found, gifted, or purchased through Craigslist. The steel for the retractable awning, loft railing, and various brackets was salvaged from historic downtown warehouses by local metal workers, some of whom worked in Flores and Son Blacksmith Shop, which had been in continuous operation in the neighborhood from 1929 to 2015. Sourcing materials this way ensures they are rooted to stories rooted to this Place and its People. Those salvaged materials can be installed to benefit ourselves, the community, and the environment in perhaps unexpected ways. I used salvaged metal chicken waterers and old buckets to make dark-sky-compliant bucket lights that enhance our night sky, safety, and wildlife (figures 16 and 17). See here for how to make your own bucket light.
DIT (Do It Together) can be more fun than DIY (Do It Yourself)
Family, friends, friends of friends, neighbors, and I did all the work. This made for a jovial work site that also cycled barter and payment numerous times throughout the local community.
Enhance our shared public space
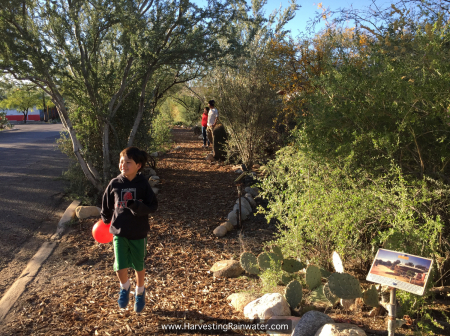
At the same time, we continued to work with neighbors and others at community plantings and workshops to transform sterile public rights-of-way along our neighborhood streets into beautiful botanical gardens of primarily native food-, medicine-, craft material-, and wildlife habitat-producing vegetation—all of it irrigated solely by passively harvested rainwater and street runoff—to create regenerative, flood-controlling, living rooms for all within the public commons (figures 18A and B). See here for more street-side planting of stormwater and life. See here for more in-street planting of stormwater and life.
The project is now mostly completed, but as with all I design, I’m always striving to continually evolve it with tweakings that further lift its potential, effectiveness, connectedness, and its overall comfort, joy, beauty, and inspiration. This way I—and all those with whom I share—keep learning. Living here is living. I daily feel alive, in relationship, happy, and grateful. Want to read and learn more? Check back periodically, then, as I plan to keep adding more related stories, guidelines, and strategies. And please email us to share your integrated innovations.
For still more, see my award-winning books:
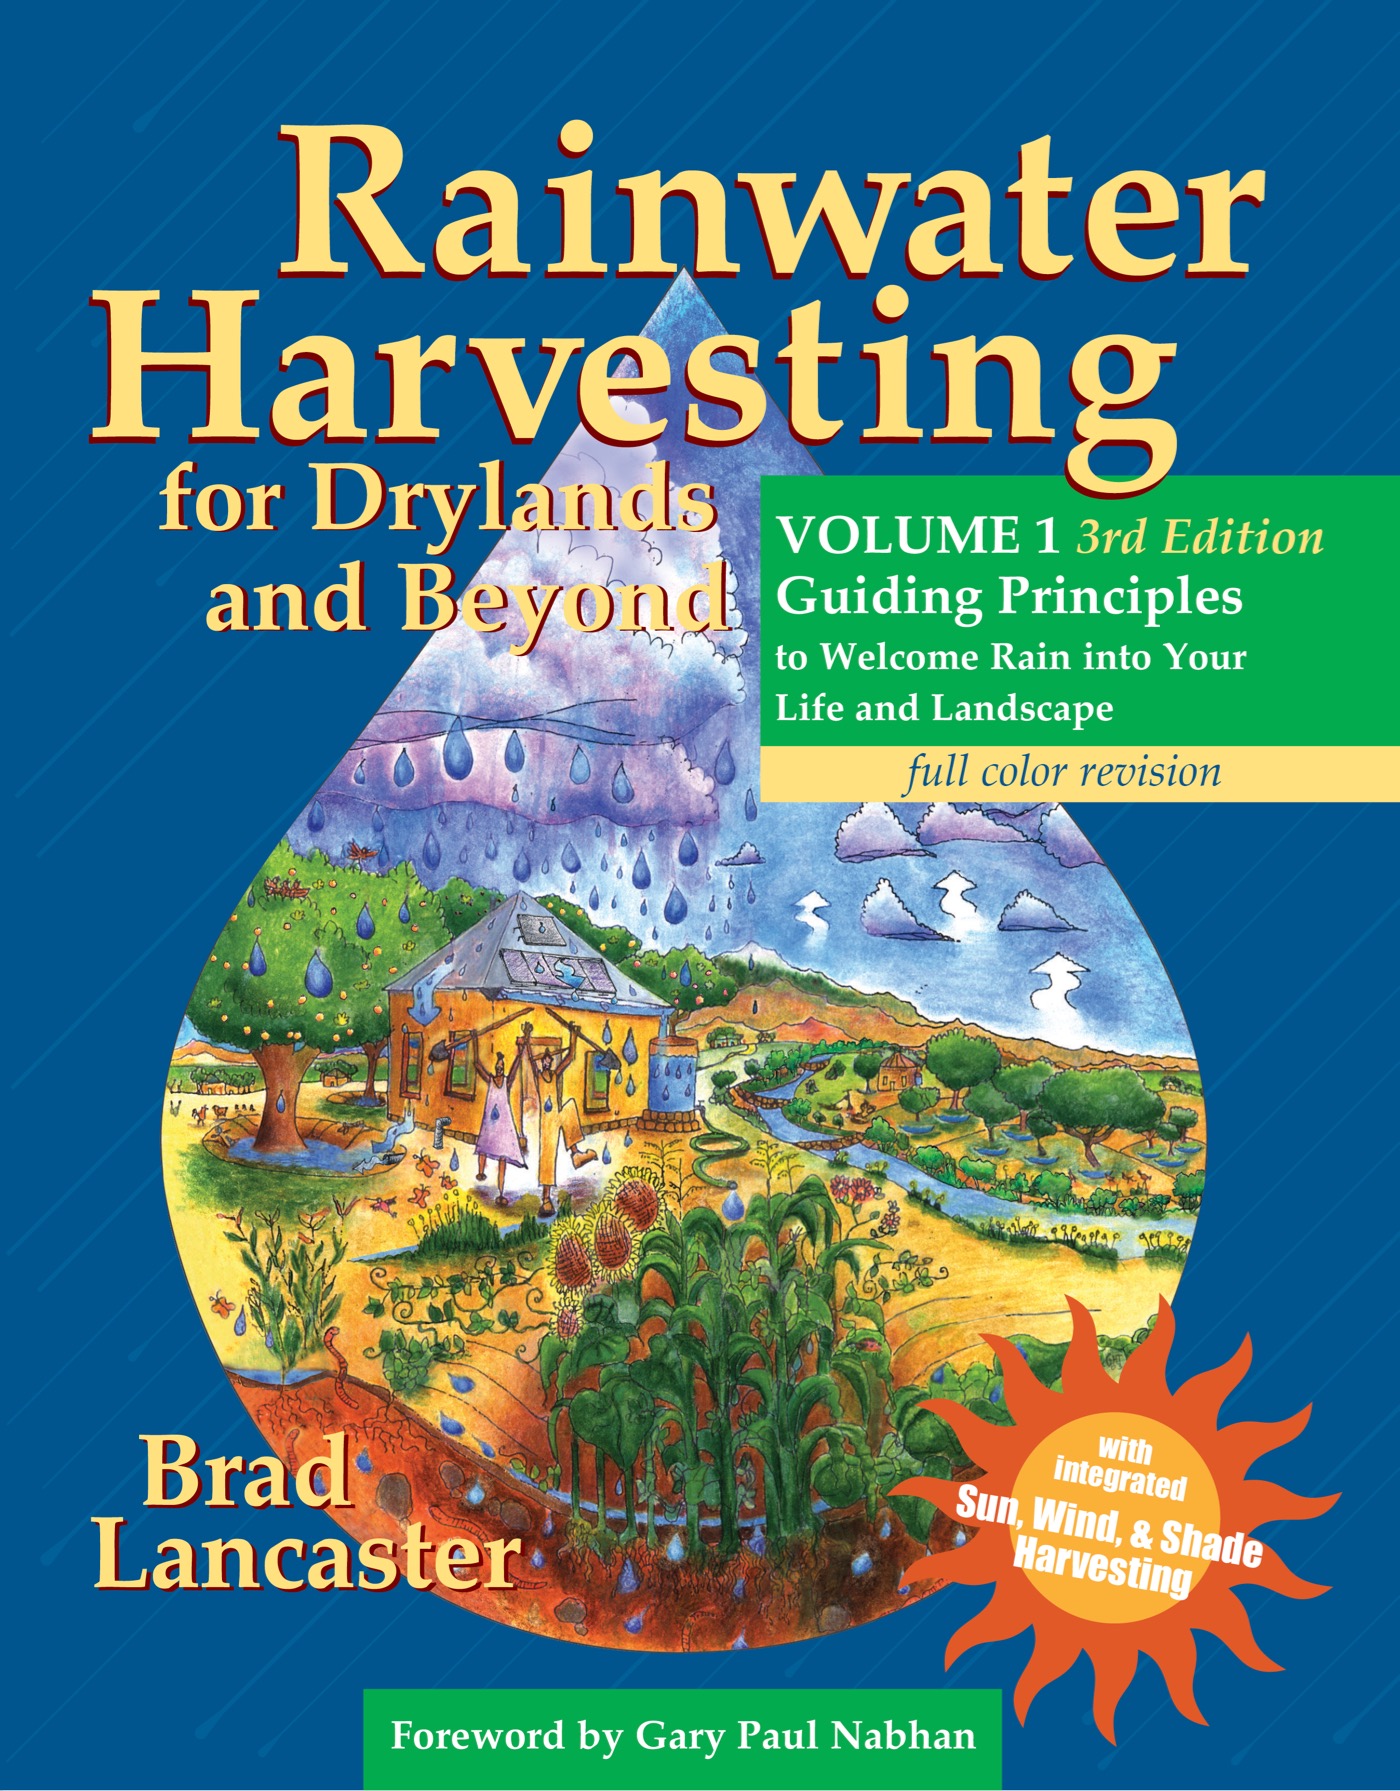
Rainwater Harvesting for Drylands and Beyond, Volume 1, 2nd Edition – contains more info on the garottage and how you too can freely harvest winter sun and summer shade (including how to best size and select your winter-sun-facing windows and overhangs/awnings).
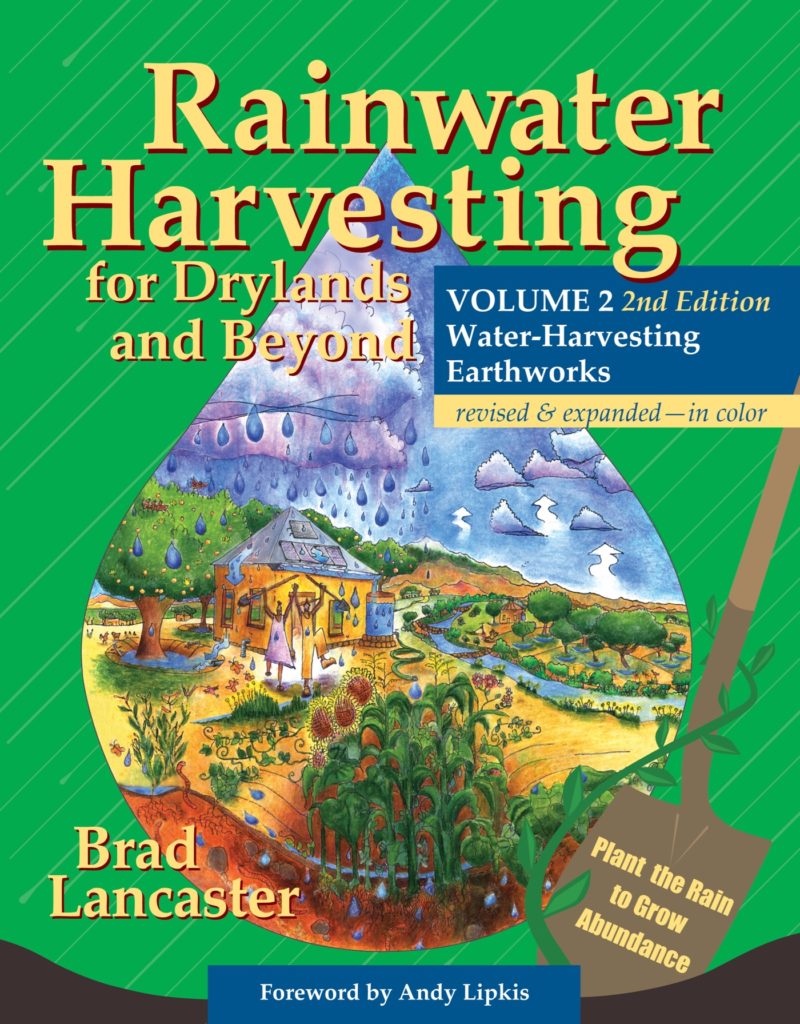
Rainwater Harvesting for Drylands and Beyond, Volume 2, 2nd Edition – packs in lots of info on how to plant rainwater, greywater, and stormwater to grow abundance.
…and other websites:
Inspirations:
- David Omick and Pearl Mast’s simple technologies for daily living and their website at www.Omick.net
- The article “Residence Renaissance” in Lloyd Kahn’s book Shelter
- Taking (and later teaching) a permaculture course(s)
Special thanks to the following friends and collaborators on the garottage project (if I’ve forgotten anyone, please remind me):
- Atlas Insulation – source of exterior rigid polyiso foam, Stucco Shield insulation, which has zero Ozone Depletion Potential (ODP) and zero Global Warming Potential (GWP)
- Peter Baer of Baer Joinery – carpentry and salvaged wood source
- BICAS – salvaged bicycle parts metalwork
- Steve Bull – carpentry
- Tom Brightman – design help
- Bill Cunningham of Solar Chill – backup solar-powered rainwater evap cooling
- Manuel Fimbrez – concrete-floor grinding
- Flores and Son (Juan and Juan) – metalwork and doors
- Heating Green – SolaRay backup radiant heater
- Lynn Jacobs – carpentry and more
- Henry Jacobson – metalwork
- Krausch Architectural Windows and Doors – local source of Kolbe FSC-certified windows
- Rodd & Chi Lancaster
- Bob Lanning and Sydnee Mitchell – architectural-drawing assistance
- Living Building Challenge – inspiration
- Jill Lorenzini – clay plastering
- Pearl Mast – design inspiration
- Ian McDaniel – carpentry
- Lucas Moseley – carpentry
- Mueller, Inc – metal roofing
- David Omick – design inspiration
- Originate Natural Building Showroom – local source of non-toxic paints
- Lincoln Perino of Ethos Rainwater Harvesting – water-harvesting assistance
- Preston Insulation & Barbara Rose – Ultra Touch natural cotton batt insulation (most of the insulation I used I bought from Barbara who had extras from her own home project)
- Allen Reilley – metal work
- Clyde Richmond – salvaged-wood floor assistance
- Jabra Robles – carpentry and masonry
- Schaffer Custom Covers – reupholstered Craigslisted sofa
- Sonoran Theatre Works – curtains made from scrap material
- TFS Solar (especially Adam Saunders and Steven Johnson) – electrical
- Primo Valdez – stucco work
Random notes:
- Floor was stained with ferrous sulfate, available in small, inexpensive packets at plant nurseries – look online for recipes
- I designed and built the garottage to attain the Living Building Challenge (goes far beyond LEED), but have not yet applied and paid for the certification
An evolving set of guidelines for Living Big By Living Small (taken from the various sections and topics of this article):
- Maximize life — minimize area covered by non-living buildings to maximize the area covered by living vegetation
- Heat and cool with free sun and shade — orient building, windows, and landscape to the sun to maximize winter sun exposure and summer shading
- Utilize heated and cooled interior space for the living — store outside any stuff that doesn’t care about temperature and comfort
- Open, don’t close — open space up, rather than dividing it up. Think one bigger multi-use room, rather than multiple smaller rooms.
- Maximize outdoor living space to reduce the need for more-costly interior space
- Design so every element serves multiple functions (for example cisterns store water, are a privacy screen, a property fence, and shade the porch from morning summer sun, while reflecting more sun into the living space in winter).
- Design so every important function/need is performed/provided by multiple elements. For example, the function/need of water is met by harvesting on-site rainwater with tanks and earthworks; harvesting/recycling on-site greywater within rain garden earthworks; harvesting street runoff within street-side rain gardens; harvesting condensate within the rain gardens; and by conserving water we already have by mulching soil, composting, growing afternoon shade traps and wind breaks, etc.
For a more-thorough look at the garottage and beyond, see Kirsten Dirksen’s video here.
See the new, full-color, revised editions of Brad’s award-winning books
– available a deep discount, direct from Brad:
